
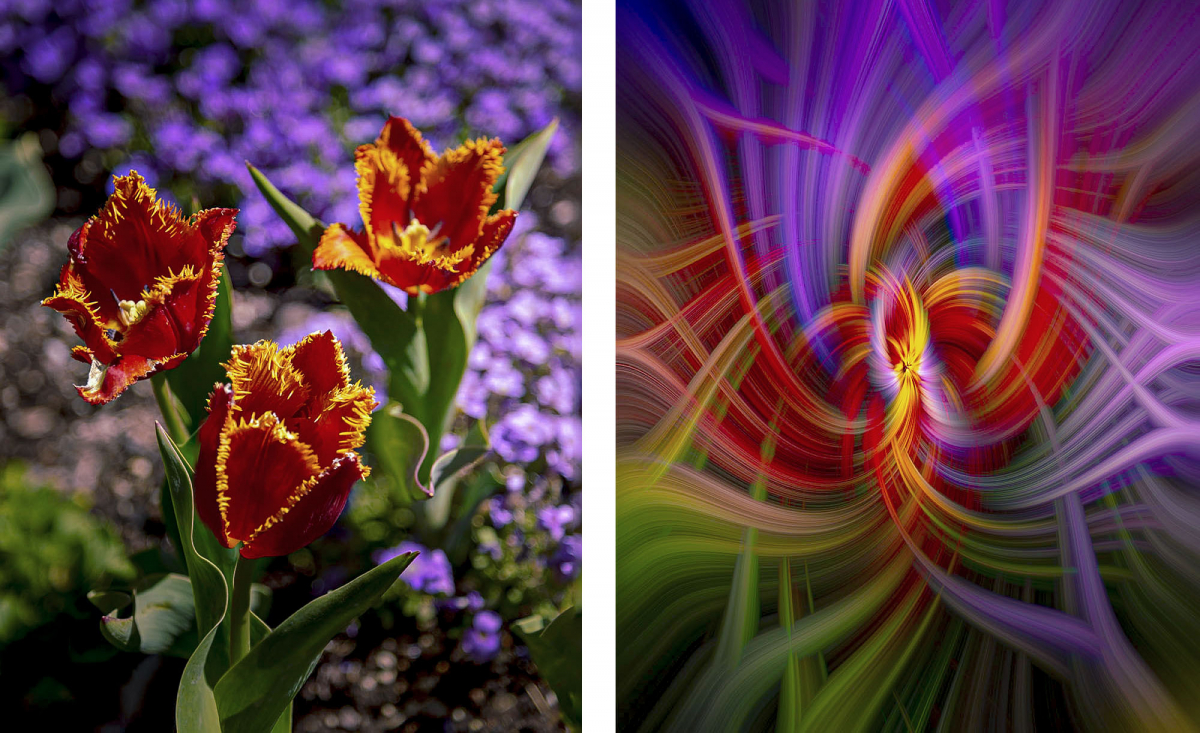
Recently I shared photos with other club members, all inspired by the club presentation on Impressionist Photography by Eva Polak and the last competition theme of abstracts. In addition to the familiar intentional camera movement and zoom techniques were some post-processing techniques I was playing with, including the above “Tulip Twirl.” While this Photoshop technique went “viral” on the Photoshop and Lightroom Facebook Groups about six years ago, it has remained “endemic,” with sporadic outbreaks of popularity as uninfected individuals are exposed to this rather contagious processing technique. I only learned of it a few months ago, and several of the photographers I shared this image with had never heard of the twirl technique and wished to know more about it. A club member entered a twirl effect image at the last club competition (abstracts) and one of the judges was intrigued enough to ask how it was done. A large portion of the community therefore remains susceptible to its allure.
At the risk of starting a super-spreader event along the Wasatch Front, I thought I would devote this blog to describing how you too can make these beguiling images. This article will use:
- Smart Objects
- Image resizing
- Photoshop Filters
- Blend Modes
- Pandemic jargon (sorry)
For more information, an internet search for “Photoshop twirl effect” provides plenty of excellent videos and article links detailing the process.
Select an image
Almost any image may be used but simple compositions are more likely to yield good results. Pay close attention to the color palette. Photos with contrasting, complementary, or analogous colors work better because the abstraction emphasizes hue over other design elements like shape and form, which we will decide later. Flowers make obvious subjects with their bold colors but I have also seen a beautiful twirl made from an image of a rusty nail in wood.
Duplicate and reduce image size (optional but recommended)
- We will be using multiple smart filters, which make heavy use of the computer processor. Unless you enjoy watching the Rotating Circle of Boredom as smart filters process your full size image, duplicate the image and reduce it to a manageable size (e.g 50%, or long dimension pixel size about 2000-3000 depending on your computer speed). Resample should be checked and set to Automatic.
- (Image > Duplicate)
- (Image > Image Size)
- The next steps will be performed on this smaller copy. Consider recording the steps as a Photoshop Action that you can apply to future images, then modify as you wish.
Convert to smart object
- Right click on the image layer and select “Convert to Smart Object”
- Smart objects allow you to modify the layer as many times as you wish, without sacrificing quality by modifying a modification of a modification. You can experiment all you want.
Apply the Mezzotint filter
- This filter adds detail (dots) or contrast (strokes) to the image, depending on which filter is selected. I used Long Strokes but there are many options to try.
- (Filter>Pixelate>Mezzotint)
Apply the Radial Blur Filter 3 times
- (Filter>Blur>Radial Blur)
- Set Amount to 100, Blur Method to “Zoom,” and Quality to “Draft” to run quicker. Click OK.
- Repeat the blur (draft quality again).
- Do this a third time, but change Quality to Best. Photoshop runs the Smart Filters from the bottom up, so this will override the lower quality draft runs. It will take longer to process this time.
Apply the Twirl Filter
- (Filter>Distort>Twirl)
- Adjust the Angle slider to the desired amount of twirl. Somewhere between 120 and 150 is a good place to start. I used 120.
Duplicate the layer and reverse the twirl direction
- Duplicate the main layer (Layer>Duplicate Layer) or use the keyboard shortcut Cmd/Ctrl J. Notice that all your Smart Filters are also duplicated.
- Open the Twirl Smart Filter on the top layer copy by double clicking on the word twirl.
- Change the twirl to the opposite direction. For example, if your first twirl was 120, try -120. Click OK.
- Now comes the fun part.
Change the Blend Mode to the effect you like best
- Blend mode images are the result of simple mathematical operations performed between the RGB values of the lower “Base” layer and the upper “Blend” layer. They do not alter the pixel values themselves. The different results can lead to amazing effects, and are a powerful tool in Photoshop.
- Open the Blend Mode drop-down menu (to the left of Opacity in the Layers tab) and scroll through the different modes to find one you like. Darken, Lighten, Screen, and Pinlight tend to be most popular. Try Difference for a psychedelic tartan look.
- I preferred the Lighten blend mode (above) for this photograph. Additional blend mode examples are seen below.
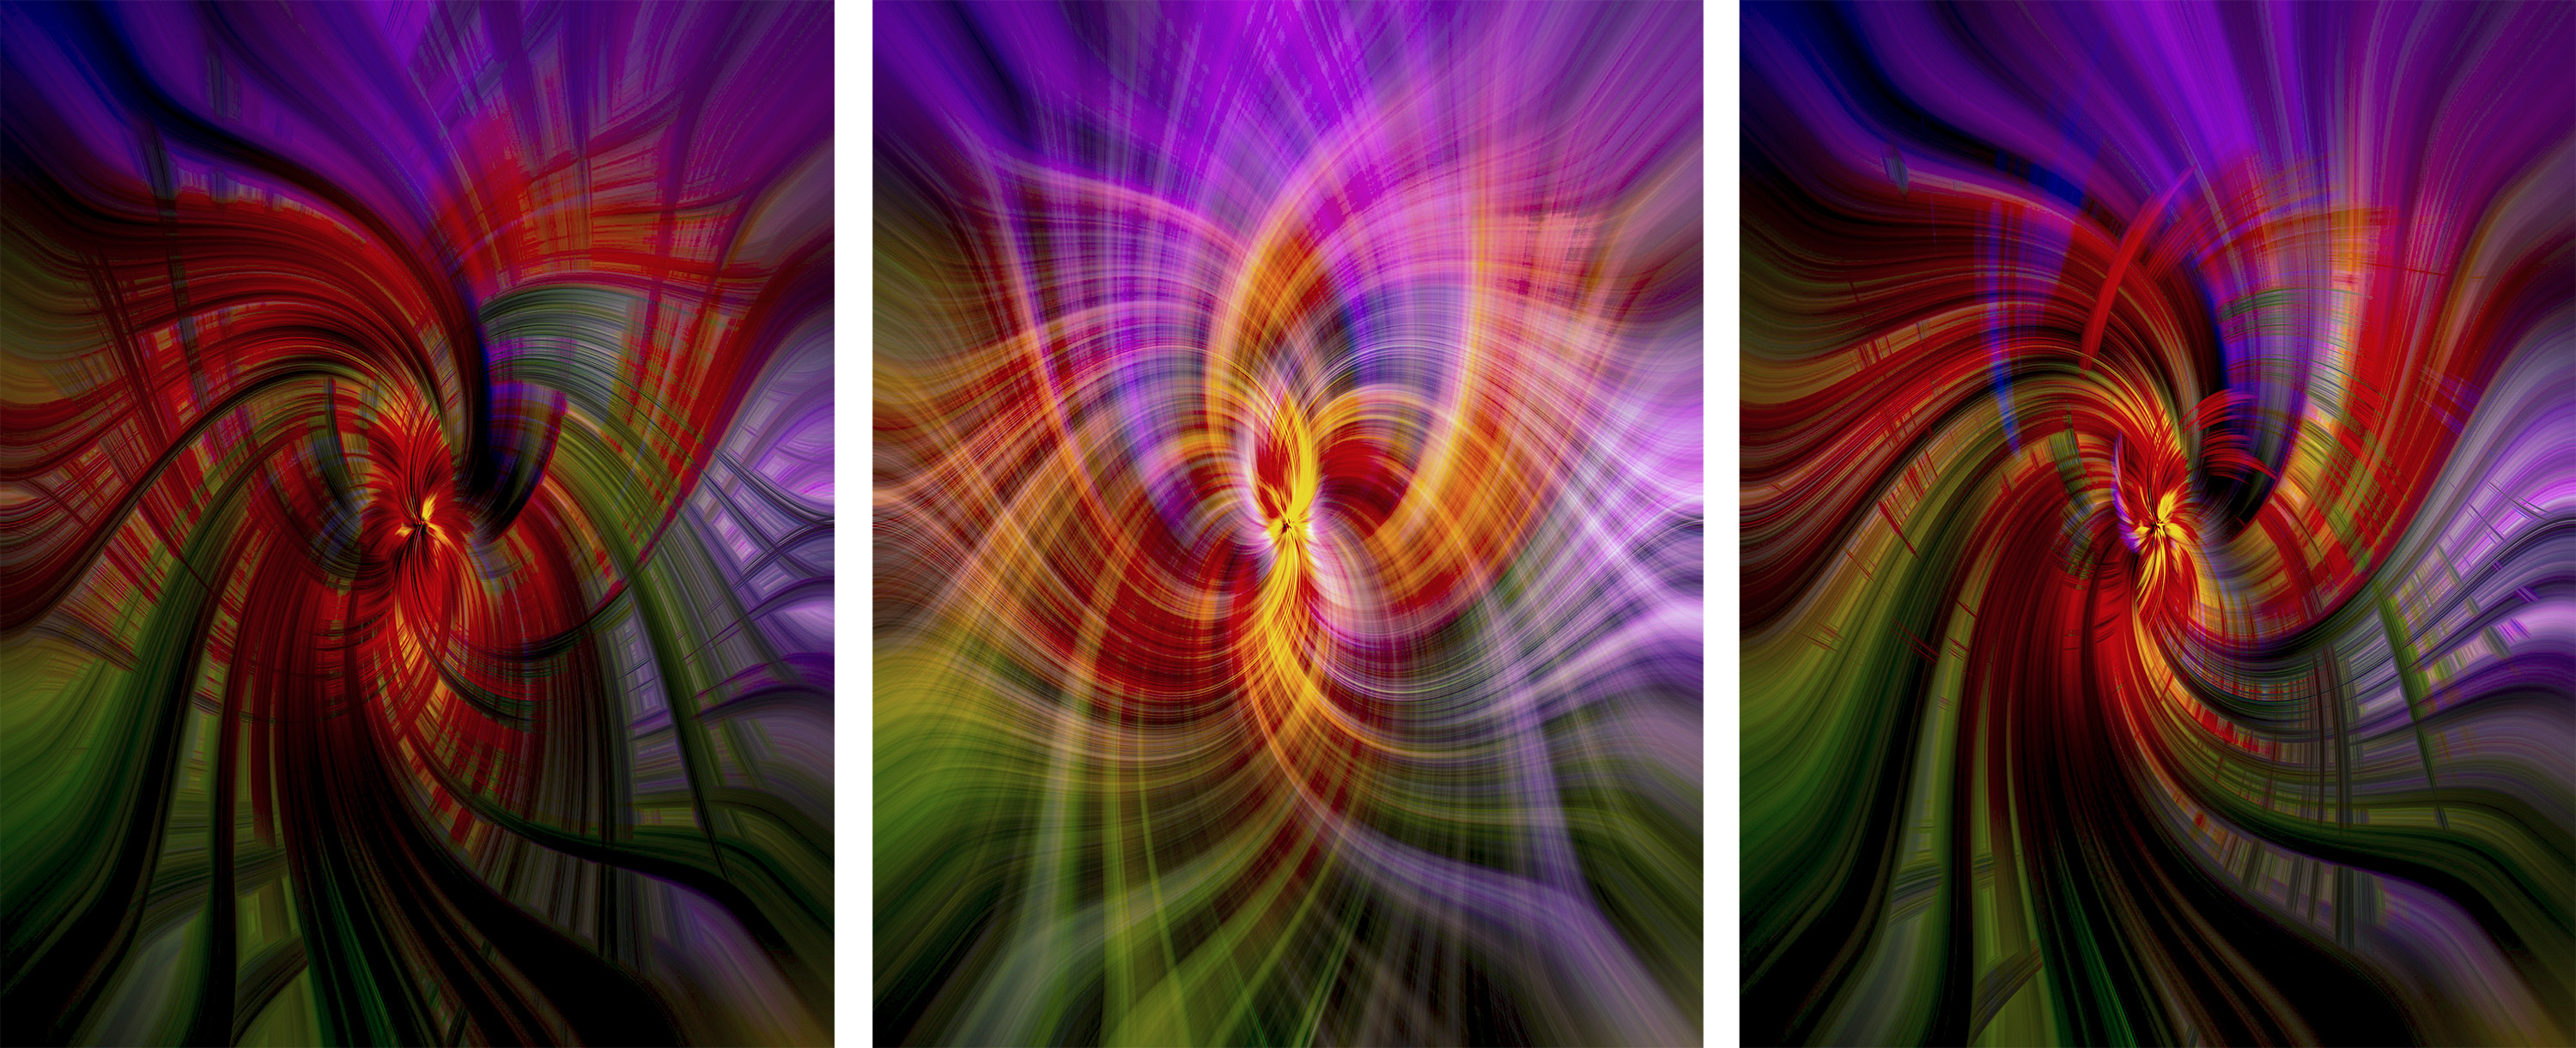 Blend Modes (left to right): Darken, Screen, Pinlight
Tweak to your heart’s content
- Experiment with various smart filter changes to see if it improves the image. Change the direction or degree of one or both twirls, disable one of the lower draft radial blur filters by clicking the eyeball icon next to it, change the selection of the mezzotint filter among the stroke, line, and dot options. The combinations are endless and much fun to explore.
- Each adjustment requires reprocessing the smart filters. This takes time and is why it’s better to use a smaller image copy for experimenting.
- Try flipping a duplicate layer across the horizontal or vertical plane to produce a symmetrical image. I'll refer you to the internet for those instructions.
- Apply your final settings to the large version of your image, if desired.
As you might guess, there are infinite possibilities for you to explore with this technique. With a recorded action you can save time and effort by jumping right to the tweaking step. Enjoy!
Greg Smith
WCC Director-at-Large, PSA Club Representative